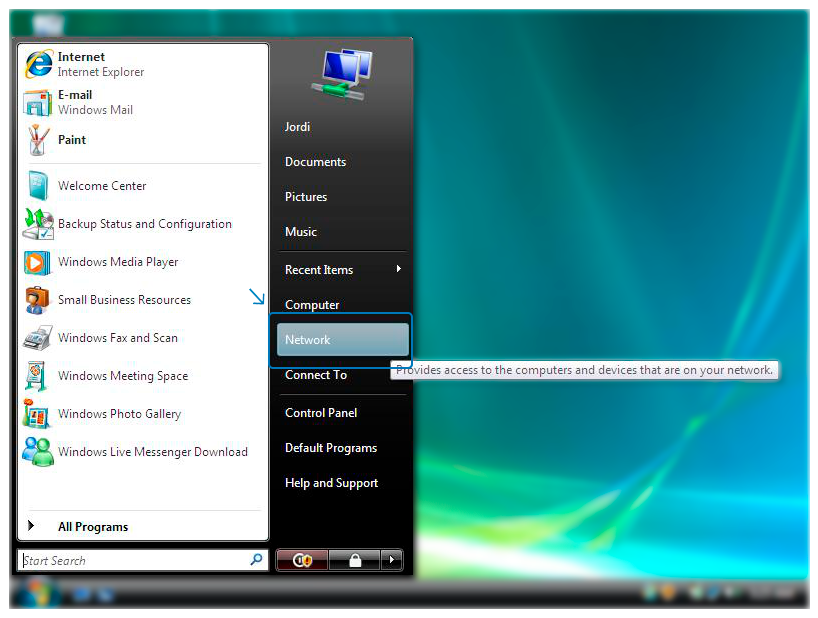
1. Click Start -> Network
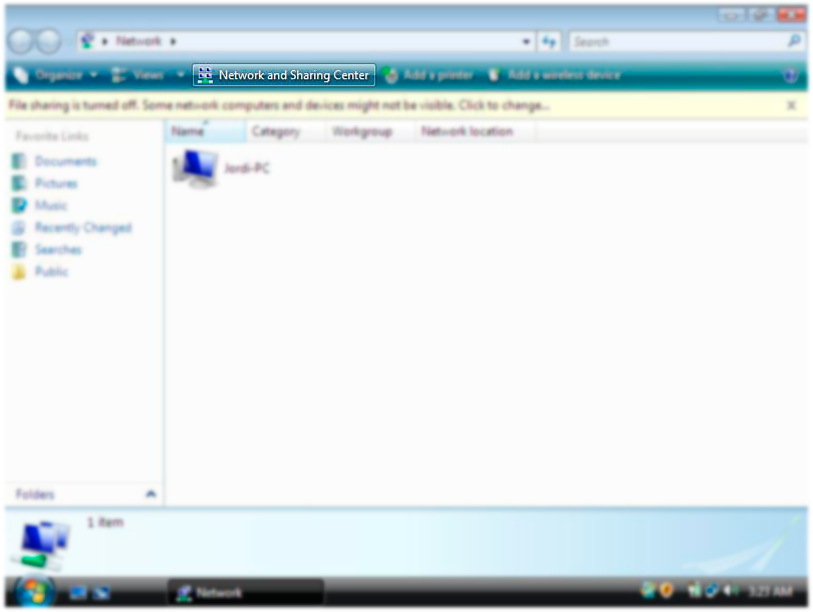
2. Enter the Network and Sharing Center
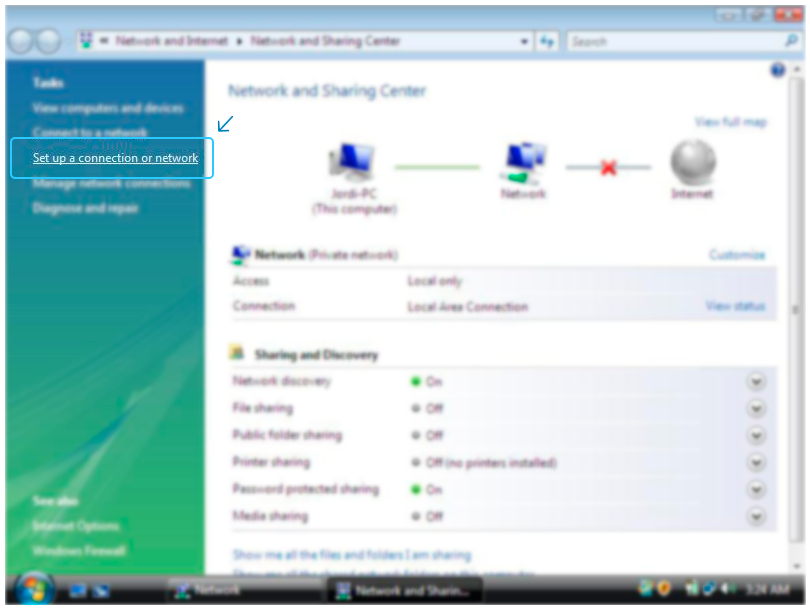
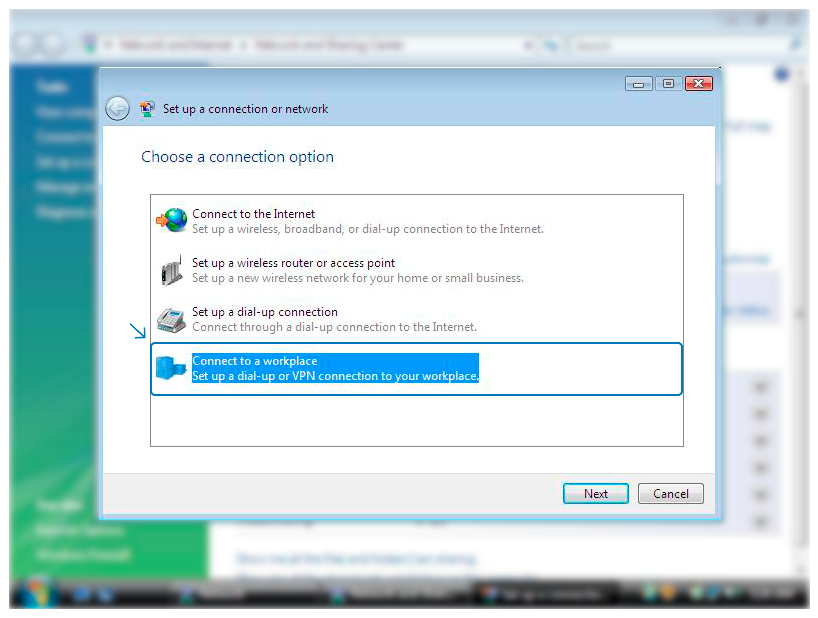
3. Choose the Set up a connection or network option
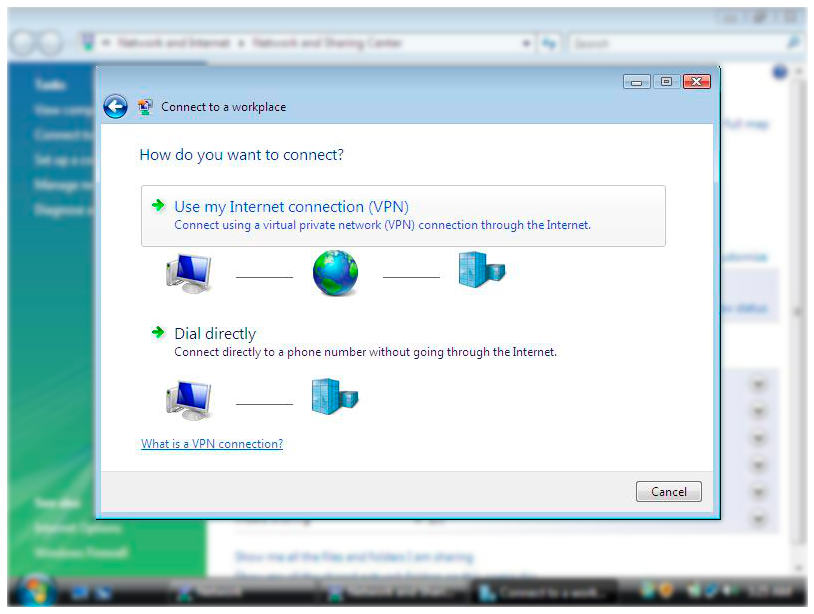
4. Click Use my Internet connection (VPN)
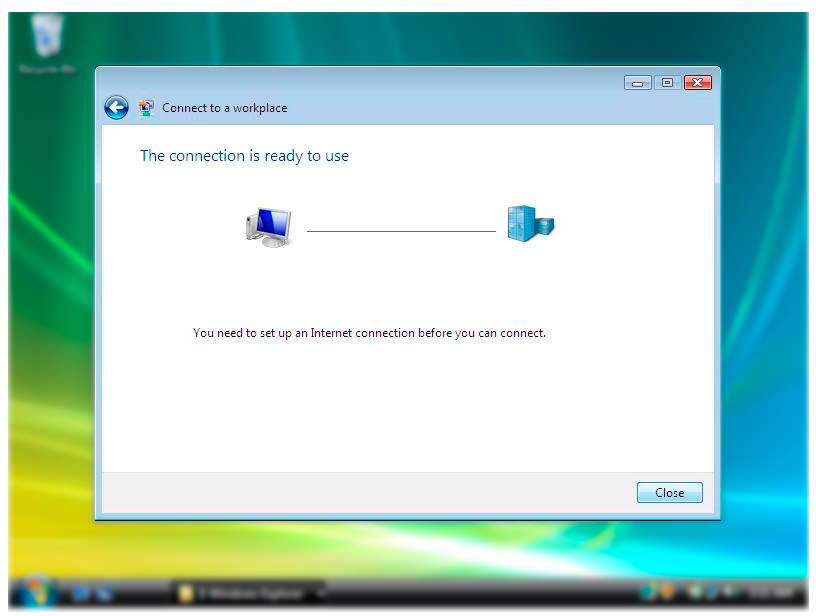
5. Click Connect to a workplace
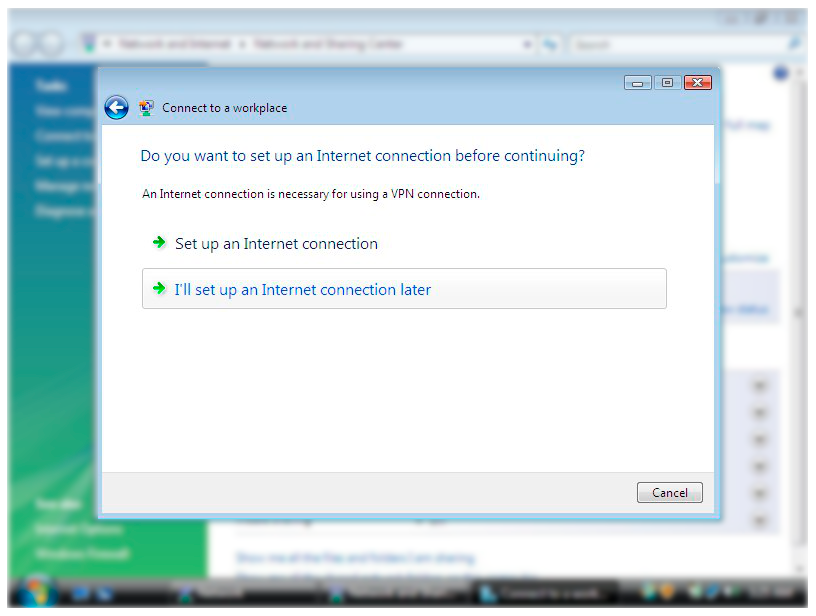
6. Select I’ll set up an Internet connection later
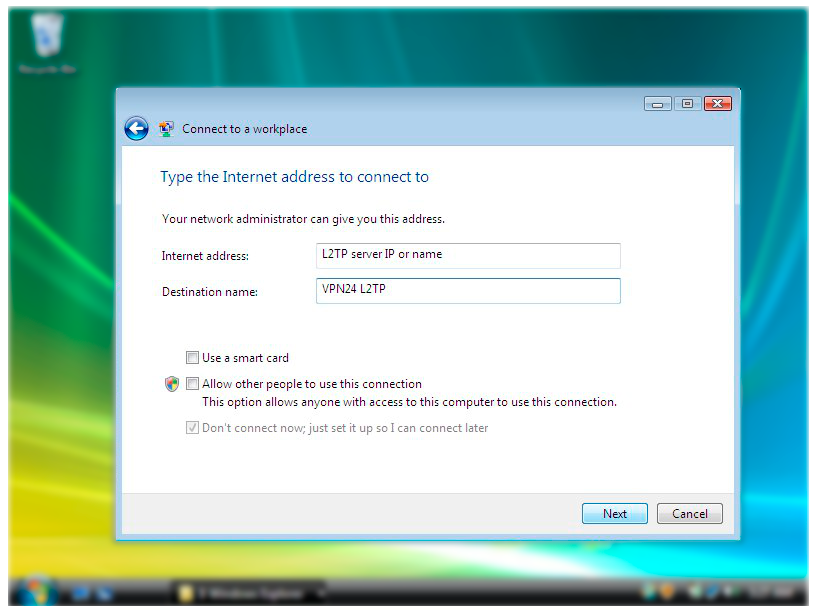
7. In the «Internet address» option you will have to select the location/server domain that you wish to connect to from our server list
Specify in «Destination name» the name of connection, i.e. «VPN24.me L2TP»
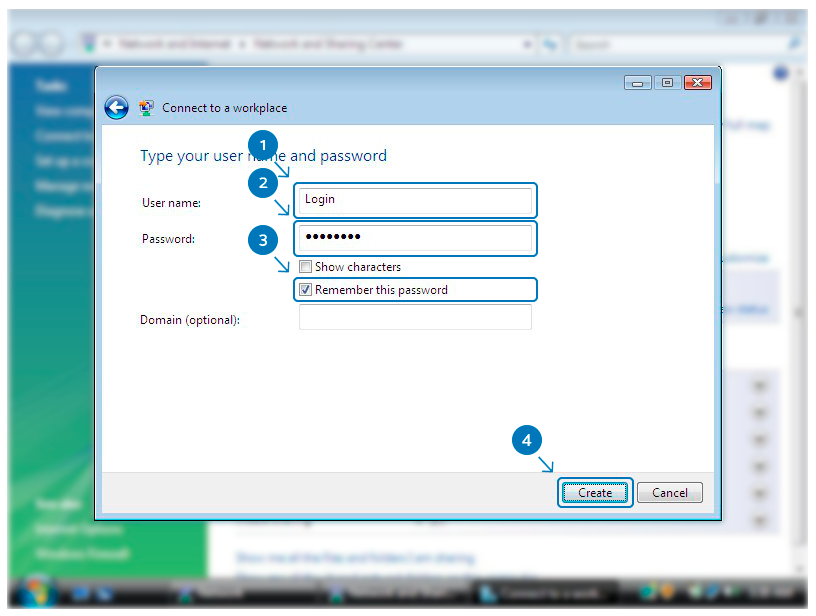
8. User name: Specify the server Login
Password: Specify the server Password
Check the box «Remember this password»
Click Create
9. Click Close
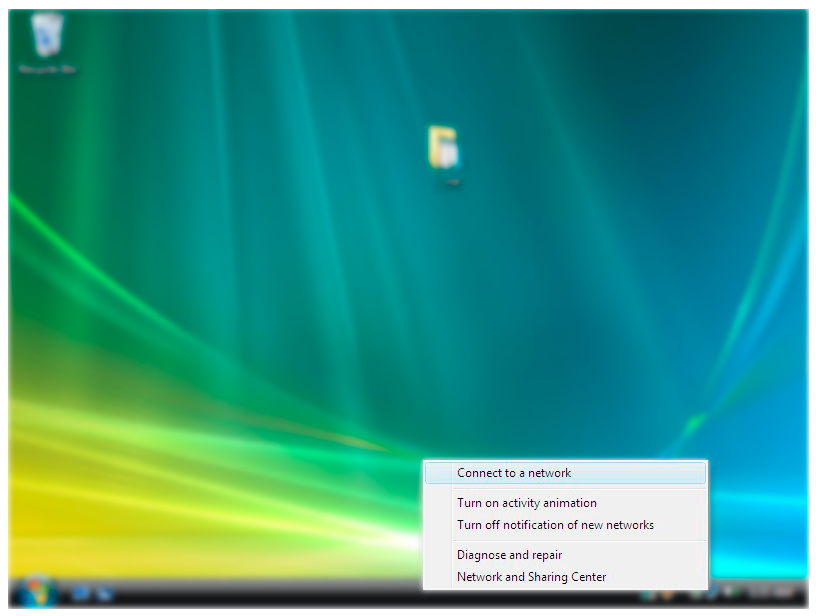
10. Right-click on the Network icon, and then Select Connect to a Network
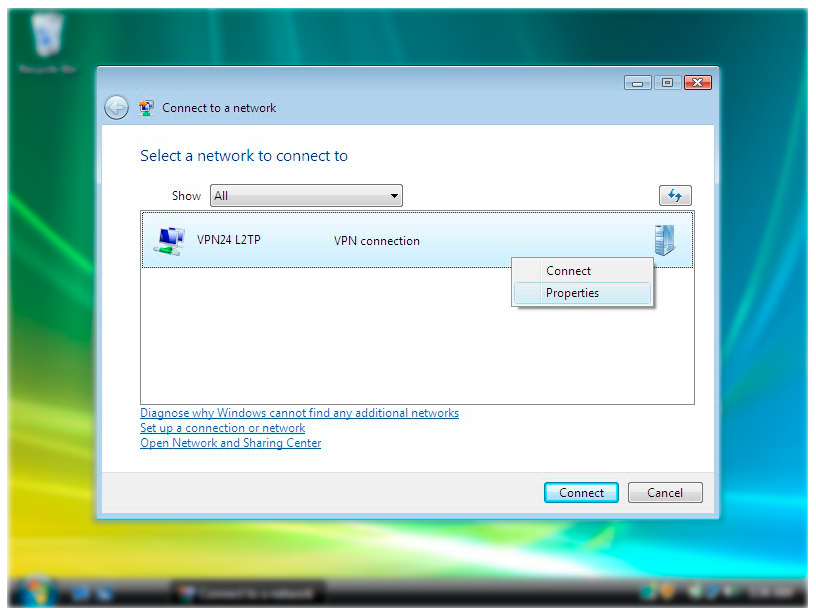
11. Right-click on your VPN24.me L2TP connection, and then click Properties
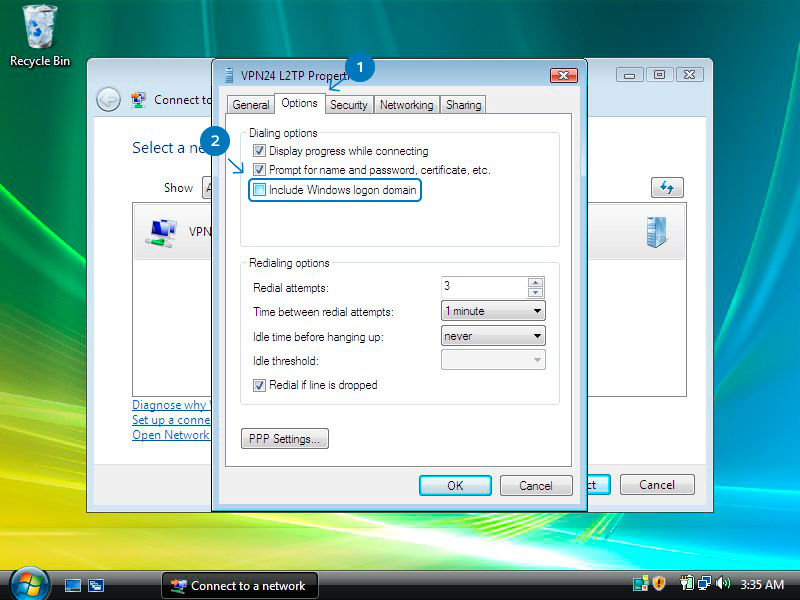
12. Click on the Options Tab, and Unselect Unclude Windows logon domain
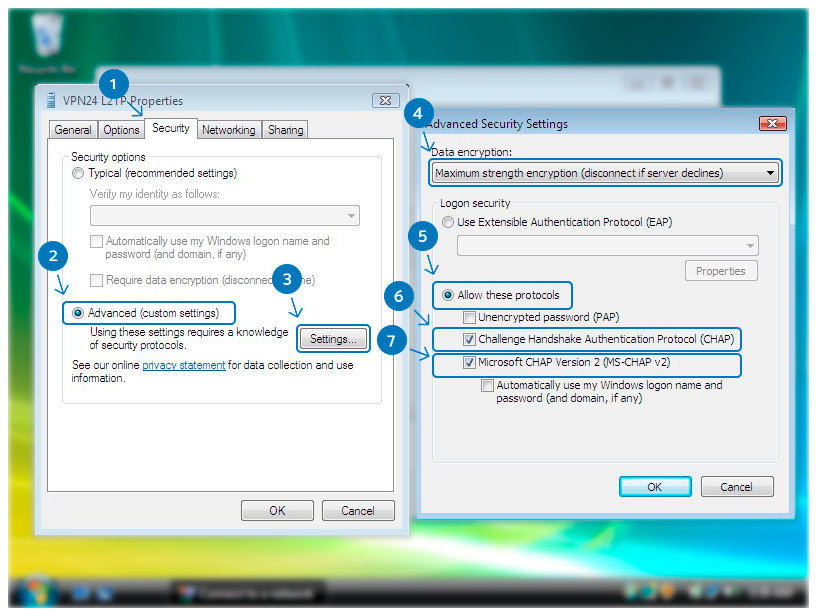
13. Click Security Tab -> Select Advanced (custom settings) -> Settings
Data encryption: Maximum strength encryption (disconnect if server declines)
Allow these Protocols: Radio button selected
Challenge Handshake Authentication Protocol (CHAP): Checked
Microsoft CHAP Version 2 (MS-CHAP v2): Checked
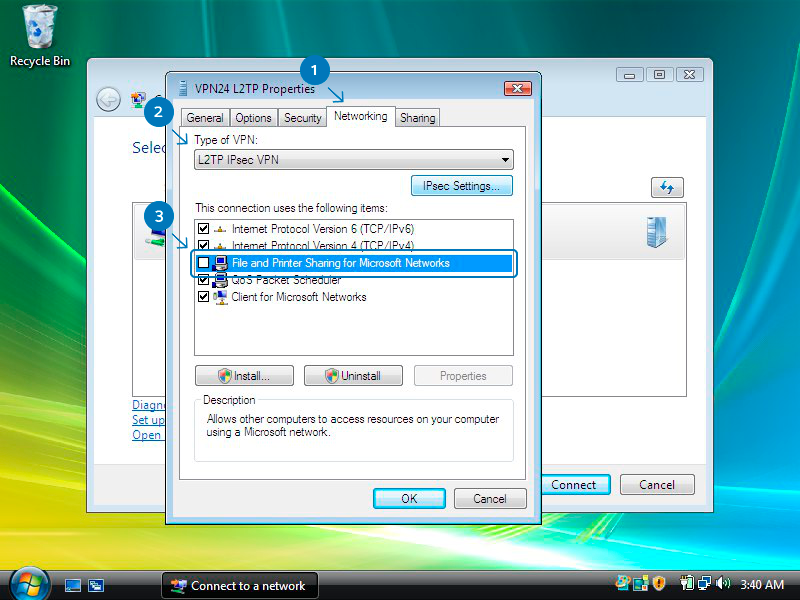
14. Click Networking Tab -> Type of VPN:L2TP IPsec VPN
Unselect File and Printer Sharing for Microsoft Networks
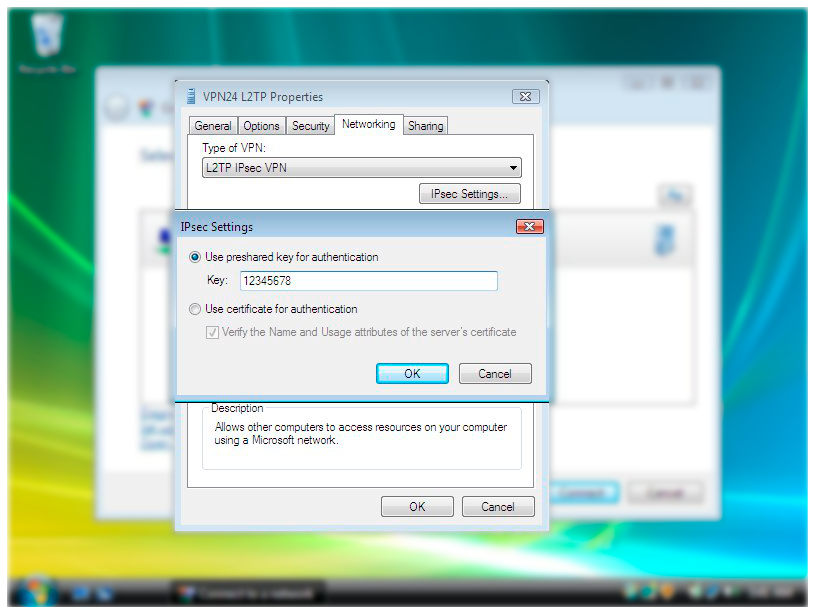
15. Click IPsec Settings -> Specify Pre-shared key (PSK) in input
Click Ok
Now you need to change your DNS, here’s how you can do it:
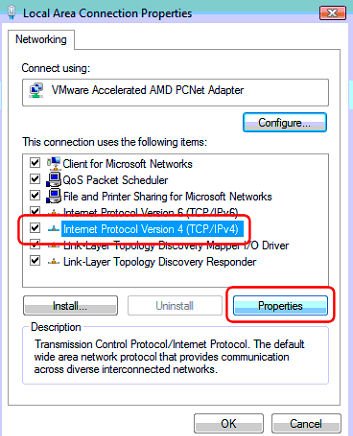
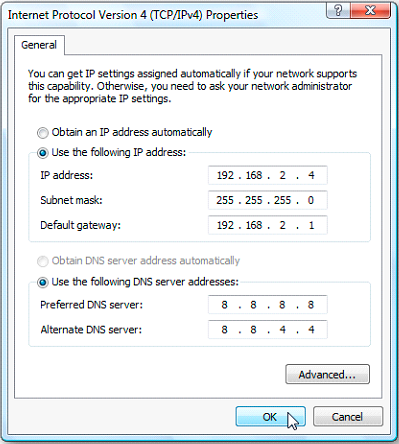
1. Right-click the network interface connected to the internet, and then select the Properties option.
2. Select and check the Internet Protocol Version 4 (TCP/IPv4) option.
3. Click on the Properties button.
4. Click on the Use the following DNS server addresses option.
5. Insert your preferred and alternate DNS addresses.
In case you are using Google Public DNS, OpenDNS, or CloudFlare, you can insert these settings:
- Google Public DNS: 8.8.8.8 and 8.8.4.4
-OpenDNS: 208.67.222.222 and 208.67.220.220
-Cloudflare: 1.1.1.1 and 1.0.0.1
6. Click the OK button.
7. Click the Close button.
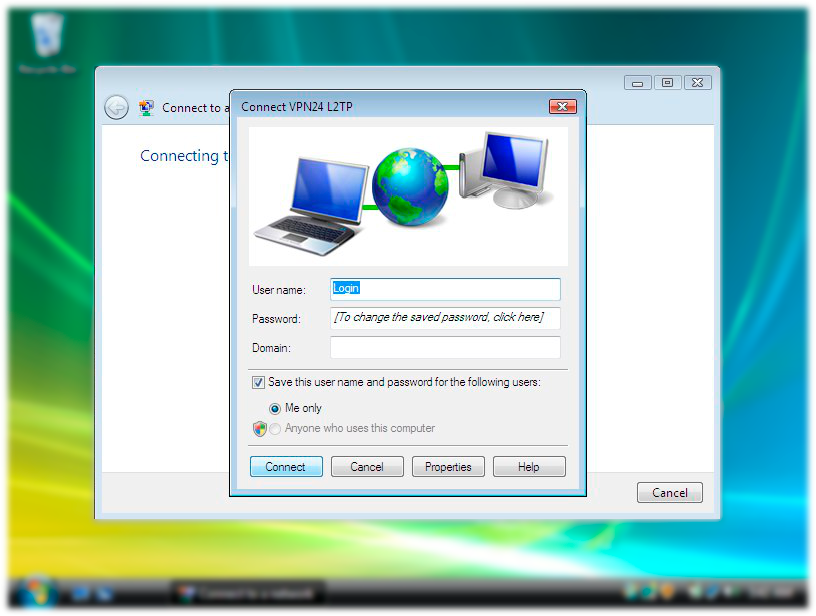
Double-click your VPN24.me L2TP connection, and in the new window Click Connect.